Sunday 5 July 2015

Chore and Activity Chart

 IMG_0033
Good morning, it's Susie here and I have made a chore and activity chart for use during the summer holidays.  It uses a 12x12 card and scrapbook page cover as the main chart and I have made a 6x4 chore card for each of my children, so that they have NO EXCUSES not to know what is expected of them!!  

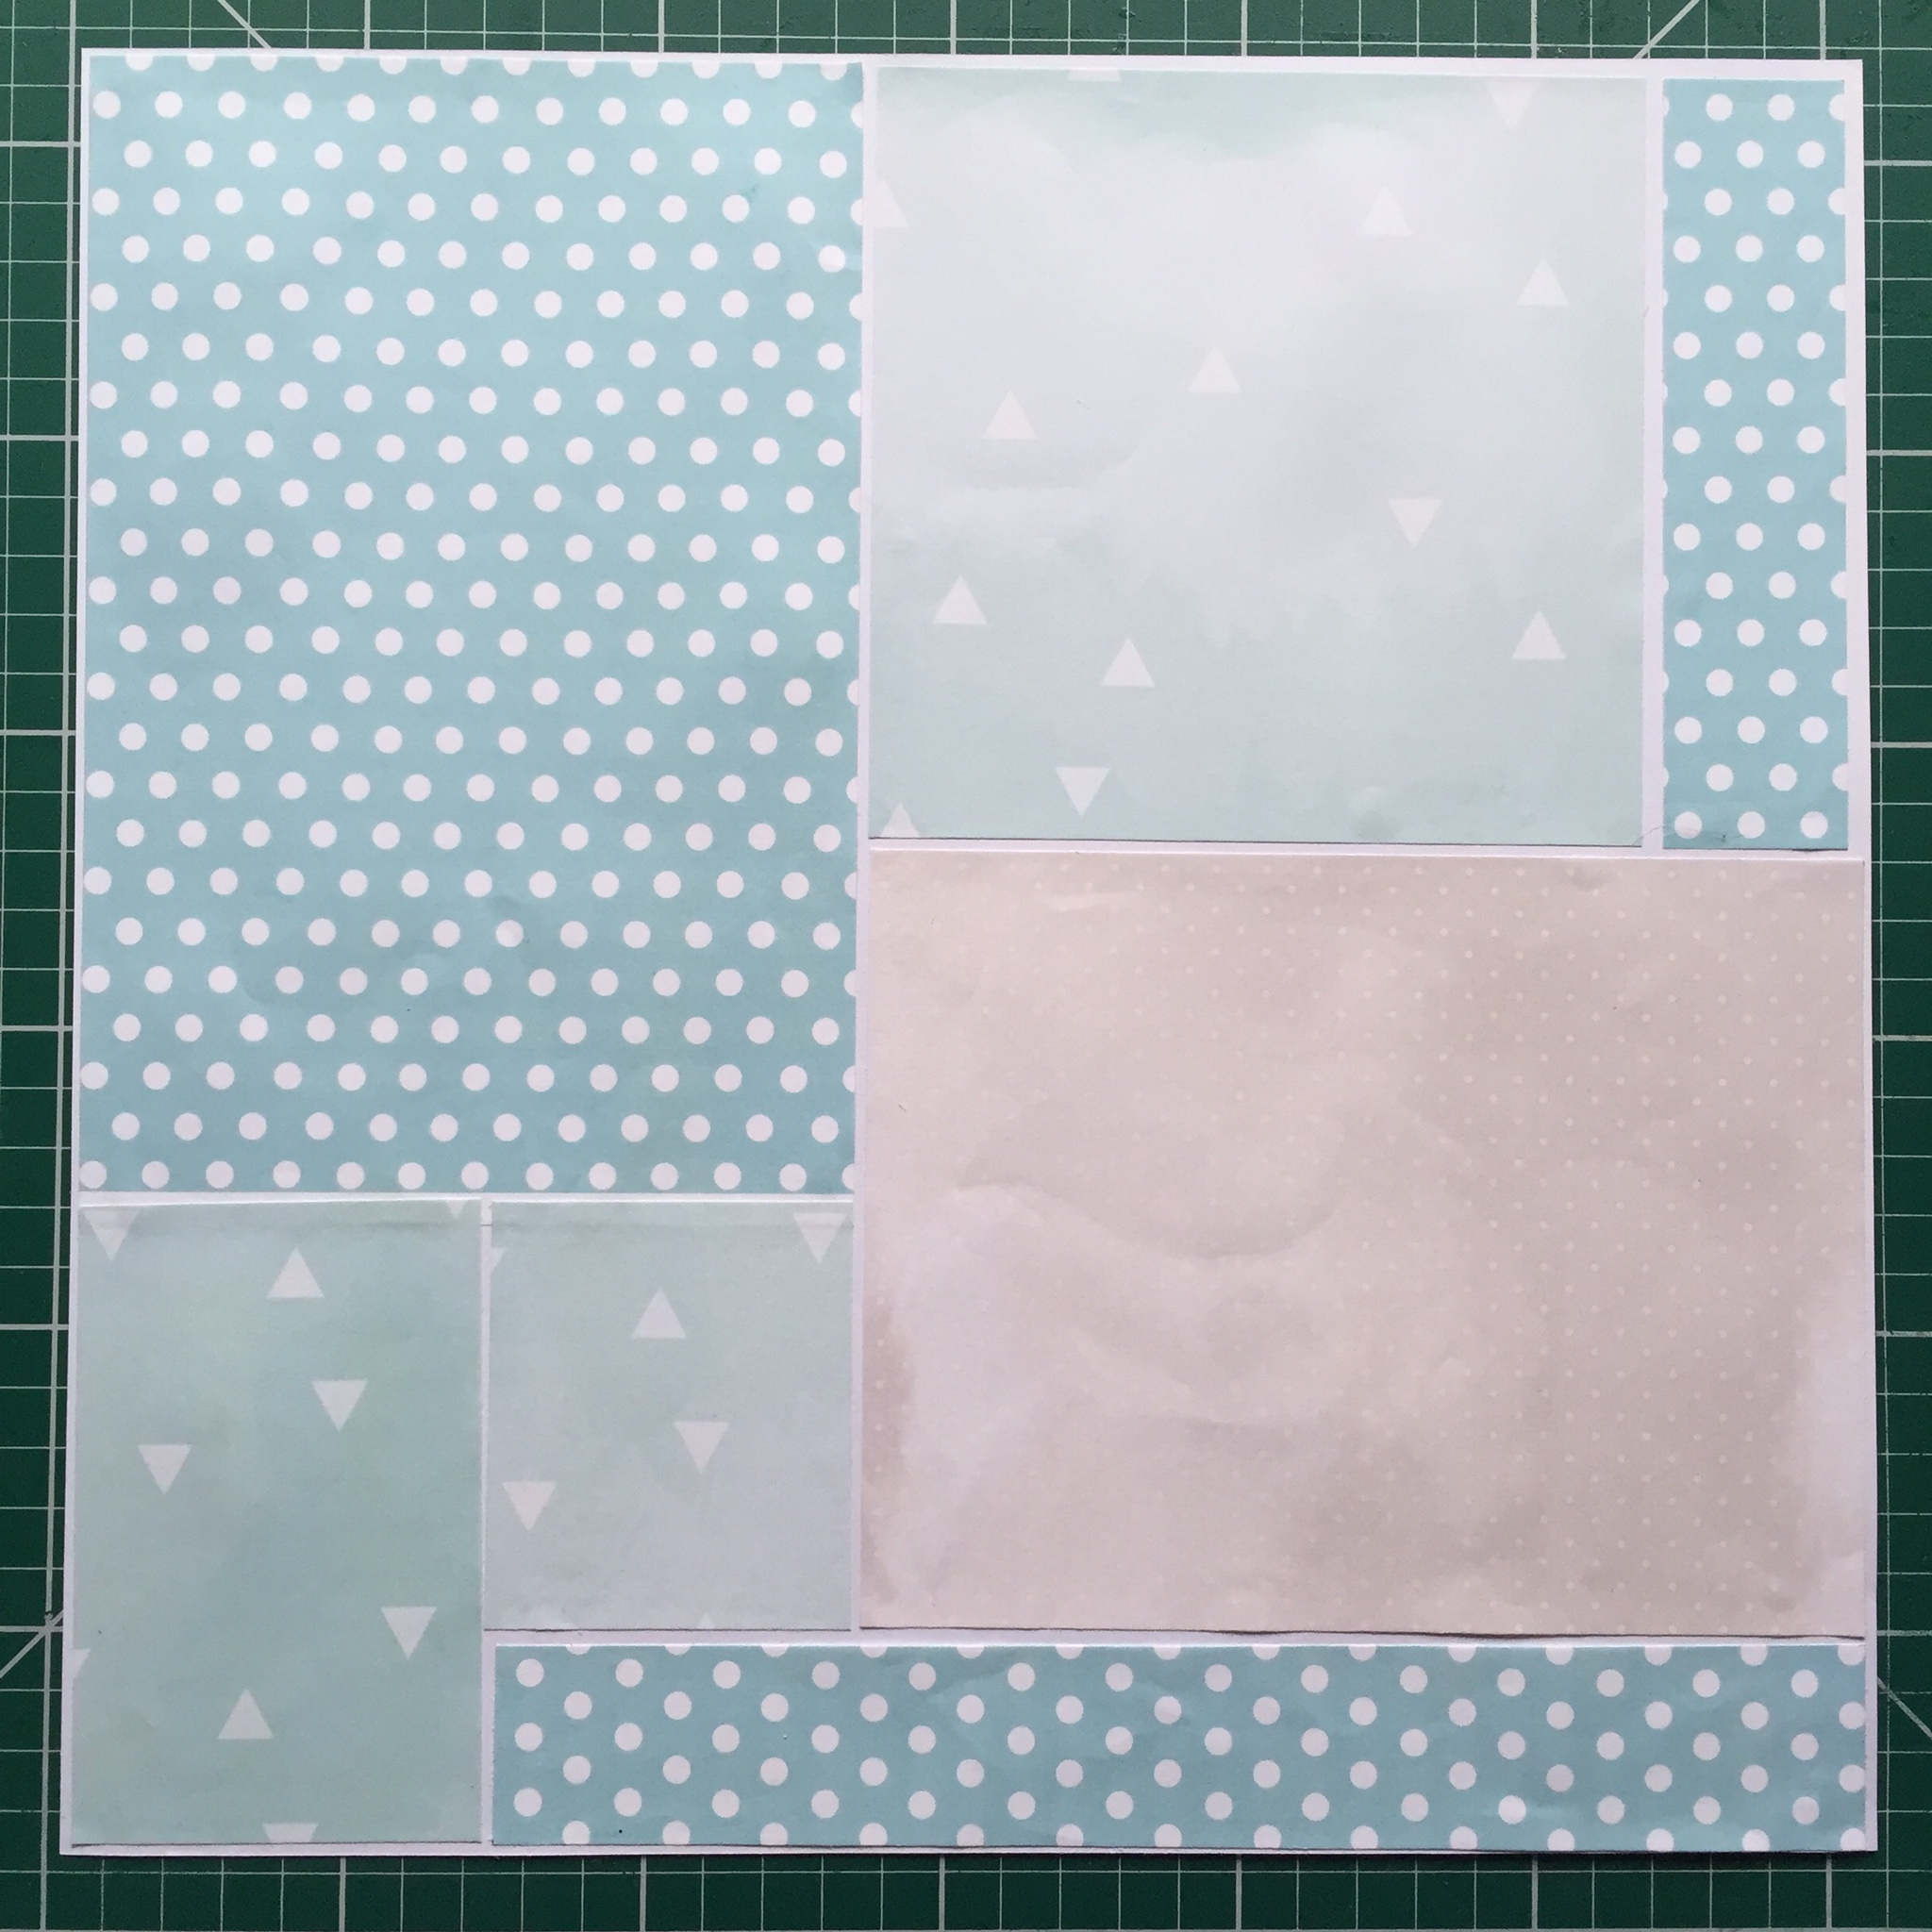
I used up scraps of Sarah's Watercolour and Dotty papers to decorate my background 12x12 page.
IMG_0028
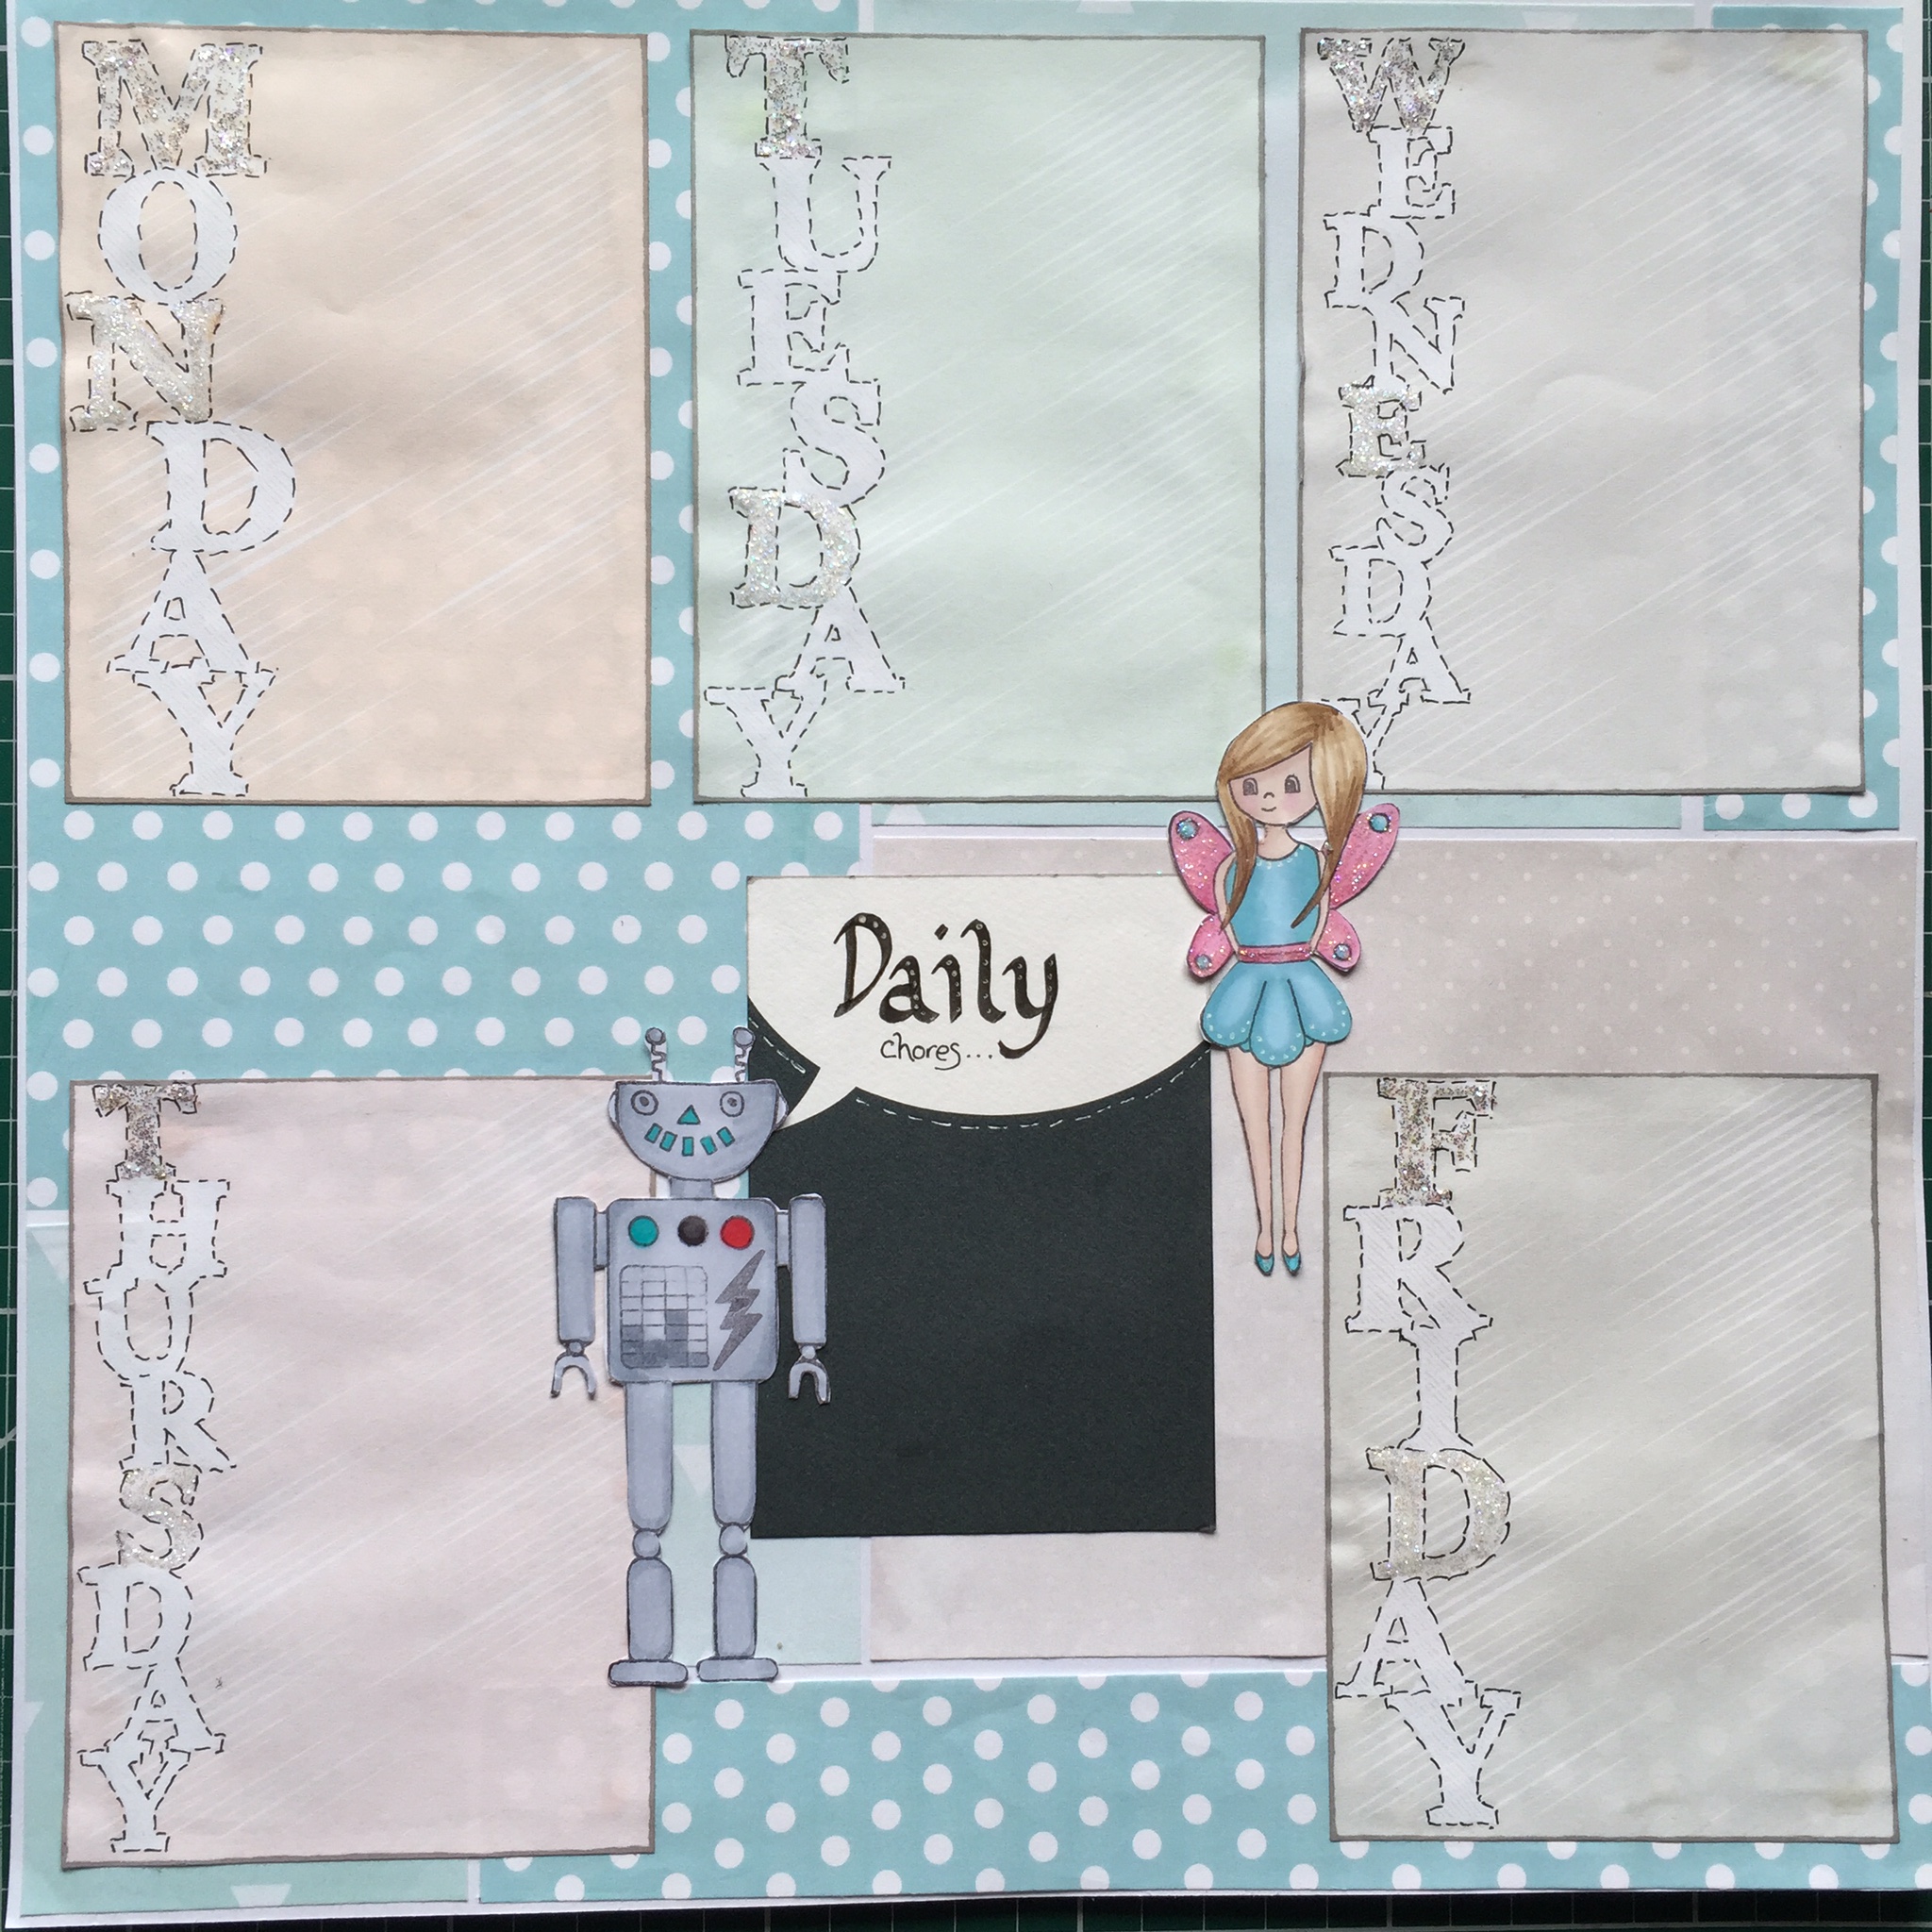
I then used Sarah's Days of the Week journalling cards, printed at 9x12cm each, trimmed and stuck them to my page.  I played around with the layout, but decided I preferred straight to the angled alternatives!  I also added a journalling card from one of Sarah's A Few of My Favourite Things Kits and use this for the daily chores.  All journalling cards were edged with grey pro marker to stand out from the background and I doodled some dashes around each letter and added Stardust Stickles to a few. 
I added Sid the Robot to represent Euan and the Flower Fairy to represent Louise.  Both were coloured with my pens and had a bit of Stardust Stickles added too.   
IMG_0032
I typed and printed my list of chores and activities that I knew we already had planned:  white for the chores, blue for the activities.  
I then decided that it would be easier for each of my children to remember what they were each responsible for if they each had their own card to stick their tasks onto.  So, I cut 10.5x15cm white card, which fits the cello bags I had available, and decorated a card for each of my children.  I used journalling cards from A Few of My Favourite Things sets and stamps from Sid the Robot and Flower Fairy sets for the main cards and added a character on top.  These were then slipped into the cello bags for continuous use!!  
IMG_0031
 IMG_0030


So, this is the finished items and a few of the chores/activities added.  I have it secured the chart, in its page cover, to my fridge with magnets, although it could also have ribbon attached to the punched holes and be hung.  The individual chore cards also "live" on the fridge: no excuses for not knowing where the list is!!
IMG_0034

Saturday 27 June 2015

A Bug Themed Card

Hello, our schools finished up yesterday and the sun is finally shining, woohoo!!

I've been helping a lot in school during the last month, and one of the many activities we did was a Bug Hunt in the local woods and that inspired me to make this card.

I started with two hexagons from Sarah's Zendoodle Borders & Bits Stamp Set, stamped in Wheat ink.  The ladybird, from Clare's Woodland Fairy set and the snail from Clare's Flower Fairy set, were stamped in black ink and coloured with my pencils.  The butterfly is from Clare's Garden Fairy set.

The bold stripy card was from one of Sarah's A Few of my Favourite Things kits and matted onto some red paper as a colourful contrast.  Just a little bit of Platinum Stickles completed my clean and simple (and easily mail-able!) card.

These cute insects, together with the other items in the sets, would be wonderful for a scrap layout of a woodland walk.......mmmmm, maybe I have my next project sorted!!

Monday 22 June 2015

Furry Friends for Father's Day

How cute is this little guy?!  He is from SugarNellie and is called Furry Friends Texting.  I coloured him with pencils and some Stardust Stickles.  He's even had an Apple watch added to his wrist as he's that cool!!

The gorgeously colourful papers are Beachside from Lawn Fawn, matted onto orange paper to make it 'pop'.  The sentiment has been made up from the Clearly Besotted "You & I" and "Pretty Petals Plus" sets - I love the fonts!

I think I'll enter him in the Sugar Bowl challenge!

Tuesday 2 June 2015

A Magnetic Bookmark for (Gran)Dad


I’ve been having a bit of fun with my children creating a bookmark to give to my dad for Father’s Day.  

We decided that we liked Sid the Robot (a Sarah Hurley Special Edition stamp set by Clare Brown) best for our bookmark and started by stamping him at the bottom of a piece of white card 6cm wide by 23.5cm long.

Another robot was stamped at the the other end of the strip so that they were facing different directions.  This means that they will both be upright when the bookmark is complete.


Euan and Louise love colouring and generally make a really good job, so I left them to it and got on with the rest of it.

We chose some double sided patterned card from one of Sarah's A Few of My Favourite Things packs and cut it into a strip 7.5cm wide by 25cm long and rounded each corner. 

The centre was scored to make folding easier and I attached the magnets with double sided tape at each end of the patterned side.   The magnets are optional, but I like the idea of a bookmark that cannot fall out of the book! My magnets were recycled from extremely cheap and horrible bookmarks I bought ages ago, but you can buy magnetic strips or dots from craft stores.


When Euan and Louise had completed their colouring, Euan round the corners of the strip of robots

We also scored the centre to make folding easier (or thinner card can just be folded in half) and punched a small hole at 3cm on the score line.  If you would rather not have a ribbon tassle, you do not need to punch the hole.


I like a ribbon, or tassle to make my bookmark obvious when it's in my book, so we selected some co-ordinating 5mm ribbon and put it through the hole, securing it with tape on the wrong side of our robot strip.

We added glue to one half of our robot strip and stuck it to our coloured strip by lining up the folds of each strip and pressing the surfaces firmly together.  We then added glue to the other half and stuck securely.

As a finishing touch, we added some Silver and Stardust Stickles to our robots.

 My dad will love his magnetic bookmark, which has been created by both grandchildren and daughter with a lot of love and fun!

Additional Ideas:

You could add a polyshrink Sid the Robot charm to your ribbon like the charms I made for my Doodle Home Keyring

A co-ordinating card, like Clare's would look great with it.

And I LOVE the idea of Jaine's Promise Cards!


Items Used:

White card
Colouring pens / pencils
Glue
Ribbon
Magnets

Sunday 10 May 2015

Doodle Home Keyring


Hello everyone! I have been trying something a little different: a keyring using Sarah's Doodle Home set and some polyshrink. 

I gathered the supplies I'd need to make the Doodle Home charms, including the actual stamp set and a heat gun (not in the photo):


I stamped my chosen images (the tall house, cloud and tree) from the Doodle Home set onto the PolyShrink using StazOn Jet Black ink. (The StazOn ink is perfect for stamping onto the shiny, non-porous PolyShrink surface.) Each shape was then cut out carefully and turned face down onto some scrap card. The BACK of each stamped polyshrink shape was coloured with my Promarker. (Alcohol based markers like promarkers, copics, etc smudge the StazOn ink, hence colouring the back of the image.) You can skip this step if you'd rather have your charms black and white.


Punch a hole in each shape, so that you can attach a jump ring to each charm. Now you're ready for the magic! One at a time, put a shape on a heat proof surface, hold gently with something heatproof (like an embossing tool or pencil) and use your heat gun, or hairdryer, to shrink the PolyShrink. It will shrink and curl profusely and then flatten again. As soon as it has flattened, switch off your heatgun and place an acrylic block over your shape to ensure it is evenly flat. Leave a short time to cool before adding a jump ring. This is the size of the shrunken charm compared to the original stamp. Cool, huh?!


I added chain, split rings, my charms and beads onto the keyring swivel clasp, including an extra split ring for my actual key.   I am really pleased with the finished article and think that it might also look good as a handbag charm.  

The same Doodle Home set was used to create a background and topper for my matching New Home card.  These were matted onto card from one of Sarah's A Few of My Favourite Things sets and Platinum Stickles was added to parts of the shapes.  There was a strip of background left, which I made into a tag holder for my keyring.  

The finished set:

Sunday 26 April 2015

Rainy Day Fun


I've had some fun creating a scrap page using photos from our Easter school hols.  We had an amazing time on the rare rainy day we had: splashing in the water fountains, geocaching, playing in the play area and generally enjoying ourselves!  

I used various bits and pieces from Sarah Hurley's All My Favourite Things kits, Rainy Day set, Doodle Home set and Ronnie the Robot set.  Please take a wee look at the blog for more details.


Thursday 16 April 2015

A Pretty Oceans Gift

I had soooo much fun making this card!  To begin, I coloured the beautiful Ocean's Gift from Sugar Nellie with promarkers.  I coloured her in Little Mermaid colours as the little girl is a huge fan! The image was coloured twice so that I could layer it.

I decided that I really fancied making a special background for her, so I used my VersaMagic inks:
I dabbed and pulled the ink pads across the card and used a damp/wet paint brush to soften the edges and blend.  Once dry, it was embossed using my Swiss Dots folder.  

The rock and mermaid were carefully cut out and layered onto the background and then the mermaid was cut and layered on top of that  And I added her little seahorse friend, who is super cute.  

The name banner was stamped using Clearly Besotted Basic Alphabet and edged with Stickles.  The age was stamped using Clearly Besotted Basic Numbers and the shells are from Seaside set: a Special Editions Sarah Hurley set by Clare Brown.  

I would like to enter the Sugar Bowl Challenge (for a second time in one month!!).

Sunday 12 April 2015

A Few Little Gorjuss Girls

I have always loved the Gorjuss Girls and Sugar Nellie's Gorjuss Party was a perfect excuse to get them inked up again. Also, I figured that if I enjoyed using my old ones, I might justify a few of the new ones;0)!
The top image is one of the newer ones " I found my family in a book" and was fantastic to colour! I decided to colour red hair as it's not a hair colour I colour often. The paper people were cut in miniature, as we would have done when we were little. I copied this idea from Cass, who posted a beautiful picture in the Sugar Nellie Facebook group. Thank you for the inspiration.
 
For my second (and third and fourth!!) Gorjuss Girls, I decided that I would give monotone a go and loved it! This image is "Untamed" and has always been one of my (many) favourites. When Louise was much younger, her hair was very similar to this image. Originally, I'd planned to colour the apron a colour, but really liked the monotone, so kept it within that scheme.
I've kept both layouts really simple as I want to show off the beautiful images........And I am a simple gal!!

So, I have, so far coloured 6 Gorjuss Girls, made cards from 2 AND managed a blog post!!!! Woohoo! Which means that I can play in the Sugar Bowl and join the Gorjuss Party. Are you coming too? x


Tuesday 7 April 2015

Ballerina, Bar Work and Bunting

Good morning, hope your Easter weekend was wonderful!

I have had fun creating another scene and doing some paper-piecing using the Ballet set from Clare Brown.  Isn't she cute?

Please pop over to the Sarah Hurley blog for more details on how my card was created and have a fabulous day!  x

Friday 3 April 2015

A Bright and Rainy Day Scene

I love the Charm Street Cuties Rainy Day set and made a wee scene using some ink, post-it notes and promarkers.  Take a look at the 365 blog for full details on how I made it and some of the colourful makes from my teamies.  x

Thursday 26 March 2015

Scraps and Doodles for Sarah Hurley


Good morning, everyone.  I had a collection of scraps from Sarah's Dotty Papers and Watercolour Love collections and love the Doodle Home house stamps, so created this New Home card.  Take a look at Sarah's blog to find out more about how I created my card.  


Tuesday 3 March 2015

A Wee Sausage Dog Keyring

For my post for Sarah Hurley, I thought I'd have a change from my paper craft and try a bit of sewing!  I made a keyring using Sarah's Sausage Dog pattern and some scrap denim and material..... more details over on Sarah's blog.


Thursday 26 February 2015

A Pocketful of Memories

Since becoming part of the Sarah Hurley team, I have found myself creating more scrap layouts, which is brilliant as I rarely made time for scrapbooking previously.  Today's layout is a collection of photos and memorabilia from my bairns' dance show earlier this month. 

After seeing Louise's green retro tap outfit, I decided that the green 12" square card, from one of Sarah's A Few of My Favourite Things kits, would be a great base.  (It also co-ordinates wonderfully with my last layout!).  I thought that the star card would be a great addition for my "little stars" and I loved the little journal cards and camera, also from A Few of My Favourite Things kits.  

I roughly laid the cards in position and decided that a bling studded banner would be great as the title.  ("Born  2 Dance" was the name of the show, by the way.) I sketched the rounded "rope" for the banner and placed the banner stamps to get the rough spacing.  


I then stamped the banners (from Garden Fairy, by Clare Brown) using Sahara Sand ink.  After letting it dry, I rubbed out my pencil line and stamped the letters, before drawing the "rope" back with pen and gluing the gems in place.  


 Louise felt great in this green shift dress and her wig, so the sentiment of "looking good feeling wonderful" was perfect.  The "Be Amazing" sentiment is from the Be Amazing Girl Stamp set and "Shine" is from Sid the Robot, by Clare Brown.

I ended up having more photos printed and wanted to keep other items like the tickets and running order, so I decided I would make a little pocket.  I had an orange C6 envelope, but it was a little too large for my layout, so I cut the edges to fit.  I then decided that the star card would look better than the full bright orange of the envelope, so added that to the front of the envelope and used the envelope shape to cut the top of the panel.  The panel was stuck to the envelope back - narrower  double sided tape would have been batter than this 10mm one.  A tiny bit of velcro and some decorative button and gems completed the pocket, so that none of my bits get lost, but they can easily be removed to look at.  

Sarah Hurley Items Used:
A Few of My Favourite Things kits - card, journalling cards, camera picture, This week circle, button
Garden Fairy, by Clare Brown) - to create the banner
Be Amazing Girl - sentiment
Silver Stickles - on the title and sentiments

Tuesday 3 February 2015

Using Up Some Scraps

Good morning, folks, it's Susie here today. I love to use up my scraps in new projects, which is just as well given the amount I have!

So, for today's card, I started with these scraps from various different A Few of My Favourite Things kits:

I cut the striped paper into a square and matted it onto the navy card.

The teal card was cut into a smaller square and also matted onto the navy card.

The turquoise house was cut out and windows from the cream house were glued into place.

The grey card was cut to fit across the card and small scraps of navy added to either end of the grey. (There was no navy piece long enough to match the grey, but the squares we're going to be placed on top so that wasn't a problem.).

Some small flowers were punched from the teal card and my favourite gems were stuck to their centres.

I added some Platinum Stickles to the grey and navy strip and to the house roof and left it all to dry:

Once the Stickles had dried, I stuck it all together, with foam pads behind the house to add interest. The greeting is a rub on that I have had for years and was pleasantly surprised that it still worked!!

So, from some scraps of paper and card I now have a cool New Home card, suitable for male/female/couple. What scrappy projects can you come up with?

Susie x


Monday 26 January 2015

Adventure Layout


Good morning, folks, I have a 12" layout to show you today.  It's been a wee while since I've done this size of layout, but I decided that I had too many photos to include to make a smaller layout!

So, I started with a 12" piece of green card and gathered all of the green card and journalling bits from Sarah's A Few of My Favourite Things Kits.  (Outdoors and nature seemed to demand green backgrounds!!)  I loved the "Life is a Wonderful Adventure" card and wanted that to be my centre piece.  I cut out the ends of the banner with a craft knife so that I could layer my photos behind the banner, like so:


There is also a strip of the green leaf card and some of the Snip and Stick leaves added to my layout.   Also included in the kit was this fantastic checklist banner:


I decided to secure it with a couple of eyelets as I thought that it suited the theme.  But, if you decide to curl the banner to add dimension, like I did, its best to wait until your ink has actually dried, otherwise you leave smudges, doh!!!!!

I added a little journalling to complete the memories but refrained from adding any other items to my already rather busy page.

Have a lovely day, folks.

Susie x 

Saturday 10 January 2015

Dream a Little Dream

I hope you are all well and haven't been blown away in this wild weather! Today, I decided that I fancied stamping one of the lovely Doodle Dolls from Sarah Hurley. This one is called Dream a Little Dream and is lovely and easy to colour. I stamped her onto Kraft card (aka the inside of my Christmas wrapping paper!) and coloured her with my Polychromo pencils. After shading and colouring her face, I stamped her beautiful big eyes and added a little more shading for her nose and her eyebrows. After that, I decided I would give her a little smile.....must have been feeling brave, huh?!

As is pretty normal for me, I kept the layout really simple to show off the gorgeous teal/turquoise paper and image. (Have I ever told you that my favourite colour is teal/turquoise?!!). The papers, heart and turquoise gems are from various A Few of My Favourite Things kits. I decided to add a little doodling and Stardust Stickles to finish off my card.

And here is a wee close up of Doodle Doll Dream a Little Dream Girl:

Take care, folks.

Susie x

Thursday 1 January 2015

Happy New Year!

Happy New Year, folks! I hope you all had a brilliant night last night and have had a good start to 2015. We spent a fabulous night at Nethy Bridge: a torchlight procession, ceilidh with fantastic stovies, soup and mince pie, fireworks and lovely night with friends. Most definitely a brilliant goodbye to 2014 and hello to 2015!

Whilst we've been in Aviemore, we've had loads of lovely family time, snow fun, eating and lazing about, so I've managed to read a book and do some colouring. I decided to colour up these Saturated Canary cuties first - Jules, Ava and Canary Love. I haven't coloured these in ages and had fun with some different colour combinations too. I've used my wonderful Polychromo pencils - fantastic to bring away with me as I can have all my colours in one box - I'd need about 6 boxes if I brought all my pro markers! Here are the individual close-ups:


Have a lovely day, whatever you're up to.

Susie x


Friday 19 December 2014

Sarah Hurley - Documented December - Christmas Blessings

The prompt for today (can you believe it is day 19 already?!) is Christmas Blessings. I am not a religious person, but I regularly like to think about what I am thankful for, or to "Count My Blessings", as my Gran used to say!

This Christmas, at the very top of my list is "Dad". In February this year, he was diagnosed with cancer of the mouth and neck. He started his treatment in April and has been very unwell as a result, not to mention all the associated worry that accompanies the diagnosis. I'm pleased to say that the treatment seems to have worked and he is doing well, although his body still has a long way to go to get back to normal!! But it is wonderful to acknowledge the good. (By the way, that's my mum and my nephew in the picture too.)

Originally, my layout was going to be all about my dad, but then there is just so much to be glad about, so I changed it to be one for each day of the month!! It mostly uses last year's Christmas kit, together with some more of those gorgeous turquoise gems from a previous kit.

So, what will your layout include? I'll look forward to seeing them.

Susie x

P.S Please grab your badge from the sidebar for your blog, leave your links in the comments, hashtag us on social media (Facebook, Twitter or Instagram) with #documenteddecember and #sarahhurley so we can find and like your projects - we'd love to see!

Tuesday 16 December 2014

Sarah Hurley - Documented December - What I love about Christmas

Oh my, there are so many things to love about Christmas, aren't there? Food, Christmas trees, lights, hot chocolate, Christmas jumpers, anticipation, magic, .......

But what I love most, is time together with my fantastic family. Hubby is off work throughout Christmas and New Year and the factory is closed, so he has less to stress about and nothing in particular to do (at least that is the theory!!). So we have time to watch those DVDs we've had for ages, play Monopoly, go for nice long walks with our border collie ALTOGETHER and there's always lots of eating too!!!!!


I am also loving these gorgeous papers and the snip & stick elements from this year's kit. And I've left plenty of room to add anything else I love about Christmas as I go along!

Monday 8 December 2014

Sarah Hurley Documented December- Winter Wonderland

Well, yesterday we had a little flurry of snow, which was exciting. Today it's just wet and miserable and exceptionally slippy, but you never know, we may get more snow.

My family LOVE snow and we are, most definitely, hoping for a snow filled holiday - our Winter Wonderland! Sledging, skiing, snowmen, snow angels........endless fun!!

I had already decided on a rough plan and layout for today's prompt, but when I saw Sarah's beautiful paper, in my absolute favourite teal/turquoise colour, I HAD to use that as my background.

I snipped and stuck the Christmas tree 8 for my date and layered "Baby it's cold outside" and "let it snow" onto banners over my photos. The top photo was taken in 2010 during the most awesome winter I remember and the skiing one is of Scott at Aviemore this year. I had a Kraft tag from a previous kit and decided that I could see it becoming a sledge!?! So, I drew, shaded and cut as follows:
And to complete it, I did a little bit of journalling, following the shape of the snow and added some Stickles in Picket Fence and Stardust. I also added some gorgeous turquoise gems, from a previous kit, to the centre of each snowflake. Fantastic fun!!!!